If you’re growing plants in an apartment, you’ve probably wondered what to do with the soil after a plant dies or a season ends. Tossing it feels wasteful, especially when you’re carrying heavy bags up several flights of stairs. But can you actually reuse it without harming your next round of plants?
The good news is yes, you absolutely can. Reusing potting soil is safe, practical, and way easier than you might think. You don’t need a compost bin or a backyard to pull it off.
Most potting soil still has plenty of life left in it after one planting. Sure, it might look tired or compacted, and some nutrients have been used up. But with a few simple tweaks, you can refresh that old soil and give it a second life without spending much time or money.
This isn’t just about saving a few dollars, though that’s a nice bonus. It’s also about cutting down on waste in a meaningful way. Apartment gardening already has enough challenges without adding guilt about throwing away bags of perfectly salvageable soil.
Whether you’re working with a windowsill herb garden or a small balcony full of containers, reusing your potting soil makes sense. You’ll reduce trips to the store, keep plastic bags out of the trash, and feel more connected to the natural cycle of growing things. Plus, once you know the basics, it becomes second nature.
How to tell if your potting soil is worth reusing
Not all used potting soil is ready for the compost bin. In fact, most of it is perfectly fine to use again with a little attention. The trick is knowing what to look for.
Start with the smell test. Grab a handful of your old soil and give it a good sniff. Healthy soil smells earthy, like a forest floor after rain. If it smells sour, rotten, or like a basement that flooded last year, that’s a red flag. Funky odors usually mean something went wrong with drainage or decomposition.
Next, check the texture. Squeeze some soil in your hand. Does it crumble apart when you open your fist? That’s good. Does it stay in a wet, dense clump that won’t break up? That means the structure has broken down too much, and it won’t drain properly for your next plant.
Look closely at what’s living in there. A few tiny bugs are normal in any soil, but if you see clouds of fungus gnats or wriggling white larvae near the surface, you’re dealing with a pest problem worth avoiding. Same goes for visible mold or a white, crusty layer on top. That crust is usually salt buildup from tap water or fertilizer, and it’s hard on plant roots.
Finally, think about what happened to the last plant. If it died from obvious neglect or just finished its season healthy, the soil is likely fine. But if the plant mysteriously wilted, turned black at the base, or had strange spots you couldn’t explain, it’s safer to start fresh. Disease can linger in soil longer than you’d expect.
Remember, old doesn’t mean bad. Soil that’s been sitting in a pot for months can still be great. It just needs a little evaluation and maybe a boost.
Remove old roots and clumps without making a mess
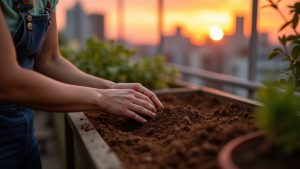
The easiest way to prep used soil without creating a disaster in your apartment is to work on a contained surface. Dump your old potting soil onto a large plastic tray, a spread-out newspaper, or even a big tote lid placed on your kitchen counter or balcony floor. This gives you a clean workspace and makes cleanup much faster.
Put on a pair of gardening gloves and start picking through the soil with your hands. Pull out any thick roots, dead stems, or obvious debris like old plant tags or pebbles. Don’t worry about getting every tiny root hair out. Fine, dry roots that crumble easily are actually fine to leave behind since they’ll break down and add a bit of organic matter back into the mix.
Next, break up any big clumps by squeezing them between your fingers or pressing them gently with your palm. Old potting soil tends to compact into hard chunks, especially if it dried out completely between waterings. If you find a stubborn root ball still clinging to soil, hold it over your tray and shake it out like you’re dusting off a rug. Most of the good soil will fall away.
A few small tools make this easier without taking up much space. A hand trowel helps scoop and turn the soil. A kitchen colander that you dedicate to gardening can help separate bigger debris if you want to get fancy, but it’s completely optional. The whole process takes maybe ten minutes per pot, and you can do it while listening to music or a podcast. When you’re done, funnel the refreshed soil back into a bag or bucket until you’re ready to replant.
Refresh old soil so it drains and feeds plants again
When potting soil gets reused, it starts losing the two things plants need most: good structure and nutrients. Structure means how well air and water can move through the soil. Old soil gets compacted and dense, kind of like a sponge that’s been squeezed too many times. At the same time, your previous plants ate up most of the nutrients that were there.
The fix is surprisingly simple. You’re basically fluffing up the soil and giving it a food refresh.
Start by mixing in some fresh potting mix. About a third fresh to two-thirds old works well, but you don’t need to measure precisely. This lightens everything up and brings back that fluffy texture. If your old soil feels really heavy or stays soggy, add a handful of perlite or pumice per small pot. Those little white or tan pebbles create air pockets so roots can breathe and excess water drains away.
For moisture balance, coco coir is your friend. It holds water without getting soggy, which is especially helpful in apartments where you might forget to water for a few days. Mix in a small scoop if you have it.
Now for nutrients. A small amount of compost or worm castings adds gentle, steady food that won’t burn roots. Think a few handfuls mixed throughout, not a thick layer. If you don’t have access to compost, a slow-release fertilizer does the job. Just follow the package directions and go a bit lighter than recommended since you’re mixing it into soil, not top-dressing.
The key thing to remember: more isn’t better with fertilizer. You’re refreshing the soil, not trying to turn it into a superfood smoothie. A light touch works just fine for most plants.
Match reused soil to the right kind of plant
Not all plants care equally about having pristine soil. Some are forgiving and adaptable, while others are picky enough that recycled potting mix can cause problems. Knowing which is which saves you from watching a beloved plant struggle unnecessarily.
Hardy houseplants like pothos, philodendron, snake plants, and spider plants tend to do just fine in refreshed soil. These are the workhorses of apartment gardening, and they don’t fuss much about whether their growing medium is brand new or gently used. Many common herbs like basil, parsley, and mint also handle reused soil well, especially since you’ll harvest them within a season or two anyway. The same goes for leafy greens like lettuce and spinach that grow quickly and come out before the soil gets tired.
On the other hand, starting seeds in old soil usually doesn’t end well. Seeds need clean conditions to sprout reliably, and leftover pathogens or salt buildup can stop them before they start. Plants that hate soggy roots, like succulents or fiddle-leaf figs, are also risky candidates because older soil often drains less predictably. And if you’re planning to keep something in the same pot for years, like a citrus tree or a big tomato plant, fresh soil gives it a better foundation.
Here’s a simple way to decide: if the plant is expensive, finicky, or something you really care about succeeding with, spend a few dollars on fresh mix. If it’s hardy, fast-growing, or something you’re just experimenting with, refreshed soil works perfectly well. You’re not locked into one approach forever. Just match the soil to what the plant actually needs.
Store reused soil in a way that won’t stink or attract bugs
The biggest mistake people make when storing used potting soil is sealing it up while it’s still damp. Wet soil in a closed container turns into a smelly science experiment pretty fast. Before you store anything, spread your soil out on a tray or in a shallow box and let it dry out for a few days. This simple step prevents odors and stops fungus gnats from setting up camp in your stored soil.
Once your soil is lightly dry to the touch, you have plenty of storage options that work in small spaces. Five-gallon buckets with snap-on lids are perfect if you reuse a lot of soil. Clear plastic totes with latching lids work just as well and let you see what’s inside. For smaller amounts, heavy-duty freezer bags with zip closures are surprisingly practical. You can even reuse the original potting mix bags by rolling down the top and securing them with binder clips or duct tape.
Whatever container you choose, make sure it closes completely. Open trays or loosely covered bins invite pests and let the soil absorb moisture from your apartment air. Label each container with a piece of masking tape noting the date and what came out of it, like “tomato pot, May 2024.” This helps you rotate through older soil first and avoid any that might have hosted sick plants.
Before storing, pick through the soil and remove any dead leaves, old roots, or plant debris. Decaying organic matter is what creates that musty smell and attracts bugs. Keep your stored soil in a cool, dry spot like a closet floor or under a bed. As long as it stays sealed and dry, it’ll be ready whenever you need it next.